Mission Accomplished: Sweet Potatoes!
This summer, we decided to get adventurous and grow some new foods. I had read about sweet potatoes and it sounded really complicated, but, on a whim, I bought some of the tubers anyways. We figured, worse case, we got nothing. Best case, we had one of our kids favorite veggies in mass supply! Another bonus was that we could ensure they were organic and non-GMO since our local “feed and seed” store specifies whether a plant or seed is genetically modified or not. I know you can go to Kroger or Sprouts and get many organic foods, but we love to grow them ourselves. Plus, its much more cost effective! We pay $19 per month for water, even with a garden, and most seeds or plants are $1-3 to get started. Cost is minimal when you grow from a seed or sprout-it’s just a matter of whether or not you will invest the time and energy to garden. For us, gardening saves us money and encourages ALL of us to eat healthier. Its more fun to eat it when you grow it yourself! Especially for children!
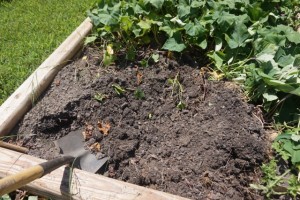
Step 1- Buy some tubers! This is a bundle of the live plants which you can plant directly into the ground.Plant the tubers in the ground straight down with the leaves sticking up above the earth. I got a huge bundle of them for only a few dollars and decided to just plant them all. We figured that many would not take…wrong! Most of them lived despite a dry summer. They grew into beautiful plants that seemed to be very insect resistant. We sprayed them once with peppermint oil diluted in distilled water when some insects attacked. We never saw the bugs again and the leaves stayed healthy all the way through the summer. In addition, the sweet potatoes themselves did not have a single worm hole unlike our cucumbers and tomatoes. One mistake that I made was planting them in dirt with shallow rows.Some people recommended building up hills or ridges, then adding dirt throughout the season as they grew. Next year, we will try this method because it will give them room to grow deeper in the earth and, more importantly, it will make harvesting must easier.
Step 2- Water them often and you will have lush, beautiful plants to enjoy. The potatoes stay underground and out of sight until you dig them up. The plants might start to get yellow leaves or they may look the same as they have for months when it is time to harvest. Unlike regular potatoes, these sweet ones often do not give you any clue that they are ready.
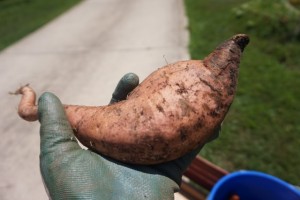
Step 3- Dig those babies up! After about 100 days, they are ready! Prepare yourself for a surprise as the roots and potatoes have crazy shapes and some of mine even decided to grow under the borders of the bed they were in. They grow really far from the plant they originate from. Finding them is a really fun “chore” for the kids! It’s like a treasure hunt!
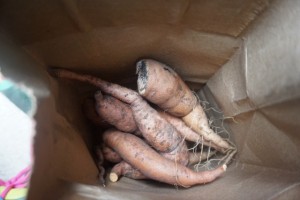
Step 4- Do NOT wash them! I read conflicting reports on whether to let them sit in the dirt out in the sun for a bit vs immediately taking them inside. We chose to bring them inside. Apparently, sweet potatoes have an amazing ability to heal themselves from the scratches, punctures, etc that occur when you dig them up. So, you leave them dirty, throw them in a brown paper bag and then let them cure for 10 days plus. You need a warm(75 degrees plus), humid(75% or more) place. Fortunately, our garage has one air conditioning vent that is just barely cracked open and some windows making it warm enough without being too hot, but also moist enough to cure the potatoes here. Some will use a root cellar or basement, but our basement is way too cold. Why do we have to cure them? Curing seals in the moisture, will help them to heal from any injuries and activates the enzymes which convert the starch to malt sugar. This process sweetens them. They are edible without doing it, but not sweet. That is no fun! There are other ways to cure them, but this worked best for us.
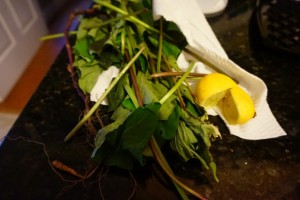
Step 5- After they cure, scrub them down and cook them! Ours were absolutely delicious and did not even need any butter! Can you imagine? A potato without butter! I am serious though. They were great and I look forward to making more dishes with our new treasure! In this picture, we have beef from a local farm cooked with the sweet potatoes and organic colorful carrots from the store(ours were not ready yet). What a great meal…all natural! There was nothing left in the pan! You can even eat the sweet potato “greens” from the plant. Just clip some off when you harvest. Check out my Facebook page for the recipe. They were fantastic too! A super food side dish.
Be brave friends! Look into the Fall crops and grow something new! Kale? Cabbage? Cauliflower? We are still deciding and will post pics soon. If WE can do this, you can too! Even if its in a pot on your porch, do what you can with the space YOU have! Baby steps…


